Using the Agent
Overview
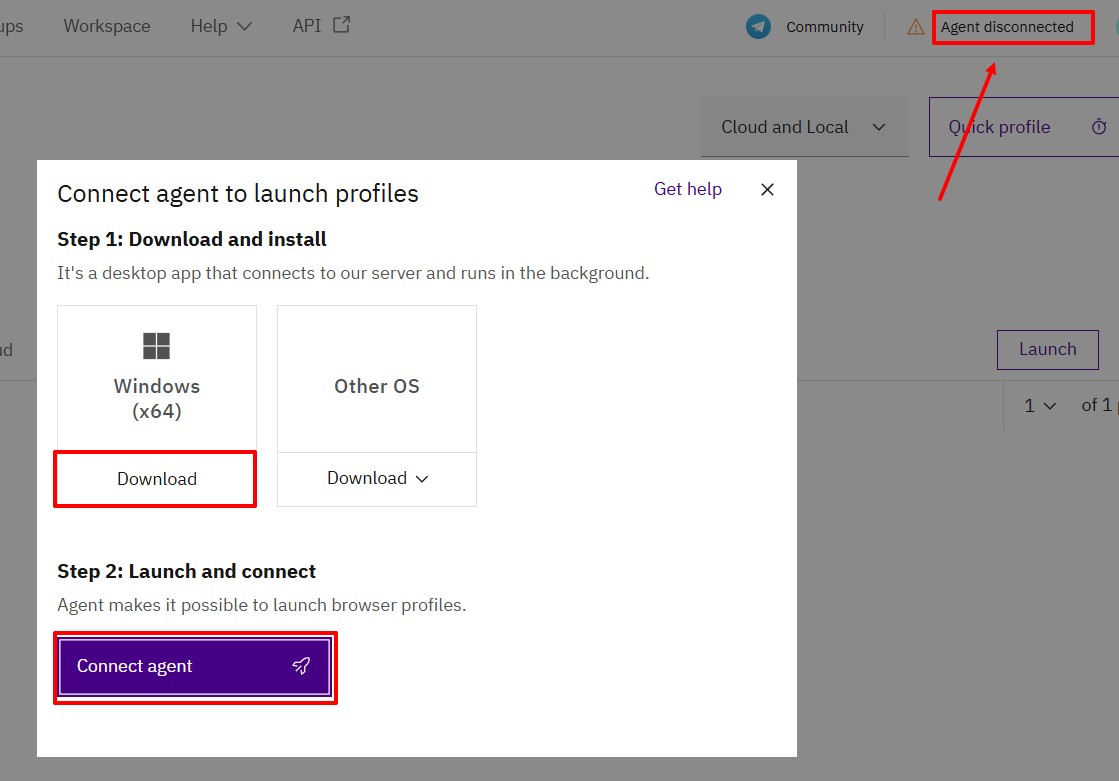
After logging in, you will see the agent connection window. This is an application that runs in the background and allows you to run browser profiles.
Without connecting to the agent, you can manage members, projects, and profiles (create, clone, move).
Encountered an agent connection error? Learn about possible causes and solutions here.
Connecting the Agent
Via the Interface
-
Download the agent for your OS.
macOSEnsure you have macOS 14 (Sonoma) or a newer OS; select "M-series" for M1, M2, M3 chips and "Intel" for other models.
-
Run the downloaded file:
- Windows: Right-click the file and select "Run as administrator"
- macOS/Linux: Follow the standard installation procedure
-
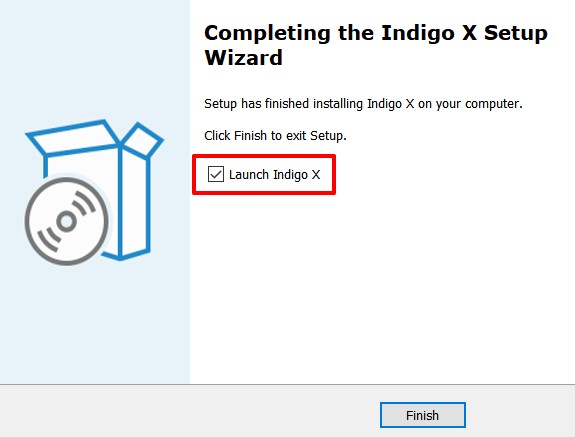
Follow the on-screen instructions to complete the installation.
-
Click "Connect Agent" and wait: Indigo X should download all components and establish the connection.
Manual Launch
After installation, the agent starts and connects automatically by default. If needed, it can be launched via the link: indigo://start?port=45000
- Windows
- macOS
- Linux
- Linux Headless
- Filename: agent.exe
- File location: C:\Users%username%\AppData\Local\Indigo X\agent.exe
- Command: "C:\Users%username%\AppData\Local\indigo X\agent.exe"
- Filename: Indigo X.app
- File location: Applications folder
- Command: open -a Indigo X.app
- Filename: Indigo
- File location: Programs list
- Command: Indigo
# 1. Download the latest version of the agent
curl -L -f -o indigodeb.deb \
  "https://indigodists.s3.eu-west-3.amazonaws.com/indigo/latest/indigox-amd64.deb"

# 2. Extract the contents
sudo dpkg-deb -x indigodeb.deb indigo

# 3. Extract control files
sudo dpkg-deb --control indigodeb.deb

# 4. Install the package
sudo dpkg -i indigodeb.deb

# 5. Start a virtual display
Xvfb :99 -screen 0 1920x1080x24 &

# 6. Start the agent
indigo &
Disconnecting the Agent
- Windows
- macOS
- Linux
Windows
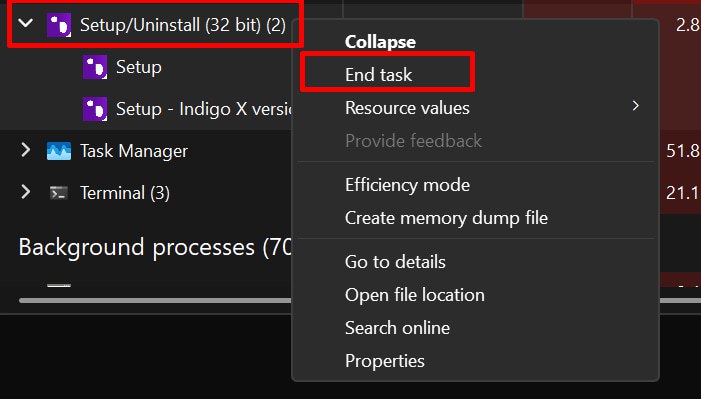
Using Task Manager
Open Task Manager
Find Indigo X and agent.exe processes
Select the processes and click "End Task"
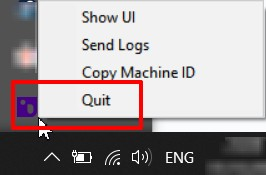
Using System Tray
Find the Indigo X icon in the system tray
Right-click the icon
Select "Quit"
macOS
Using Activity Monitor
Open Activity Monitor
Find Indigo X in the process list
Click the "×" icon or choose "Quit"

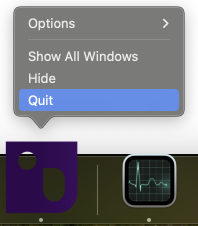
Using Menu Bar
Click the Indigo X icon in the menu bar
Select "Quit" from the menu
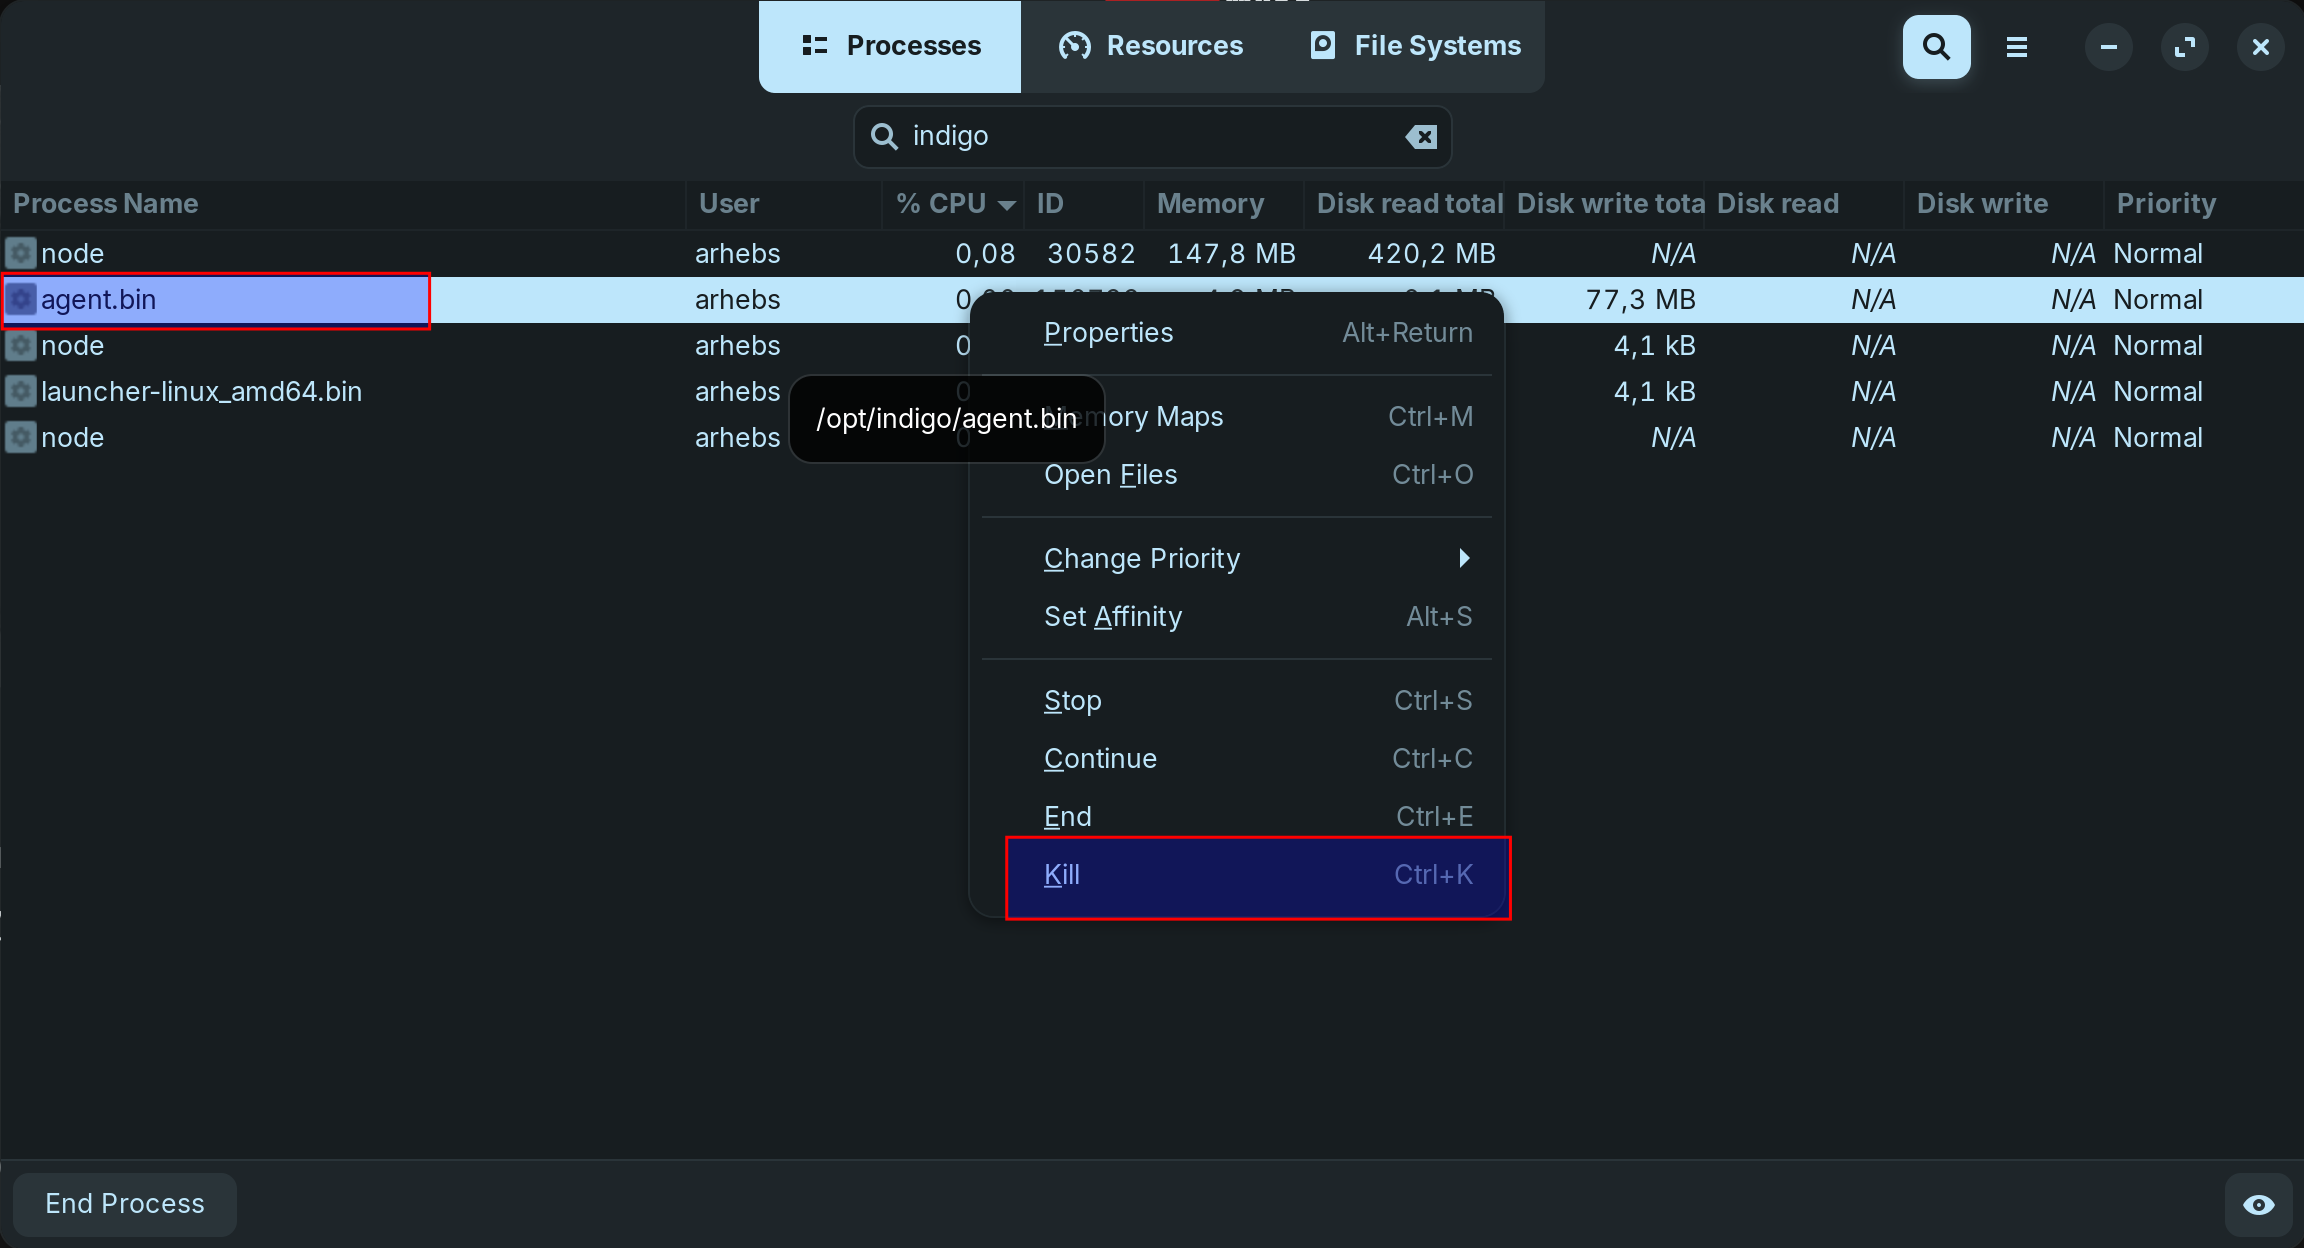
Linux
Using System Monitor
Open System Monitor
Find Indigo X processes
Select the processes and click "End"
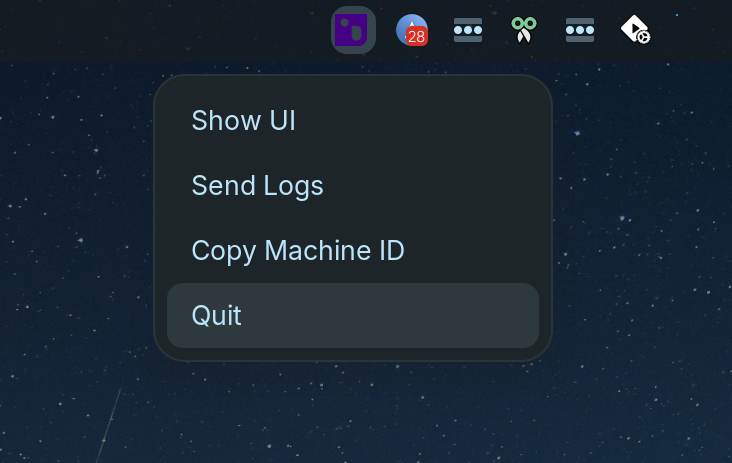
Using System Tray
Find the Indigo X icon in the system tray
Right-click the icon
Select "Quit"
Checking the Agent Version
- Windows
- macOS
- Linux
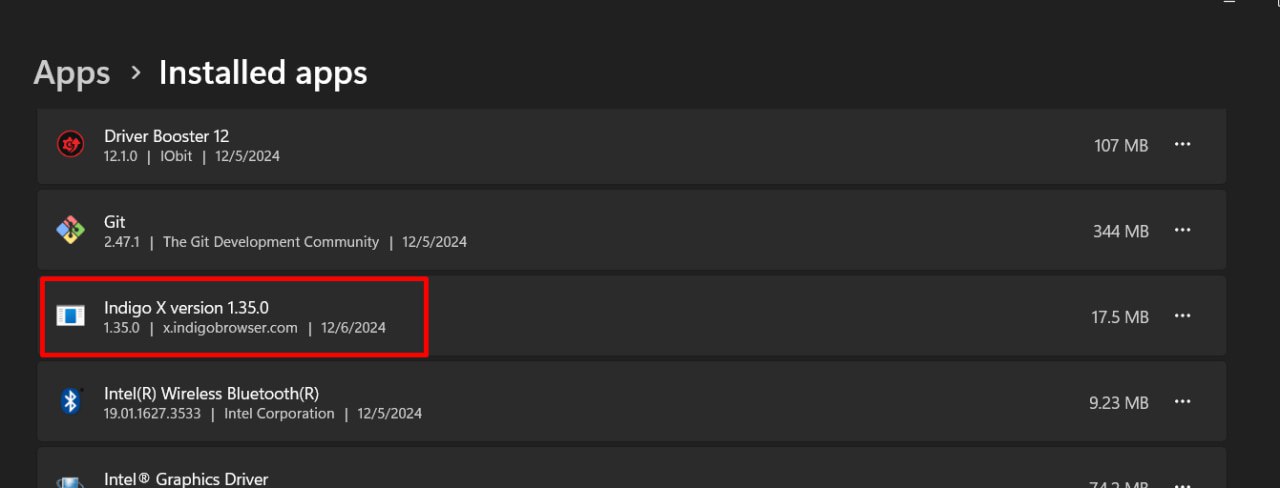
- In the Start menu, click on the gear icon
- In Windows Settings, select "Apps"
- Type "Indigo X" in the search bar
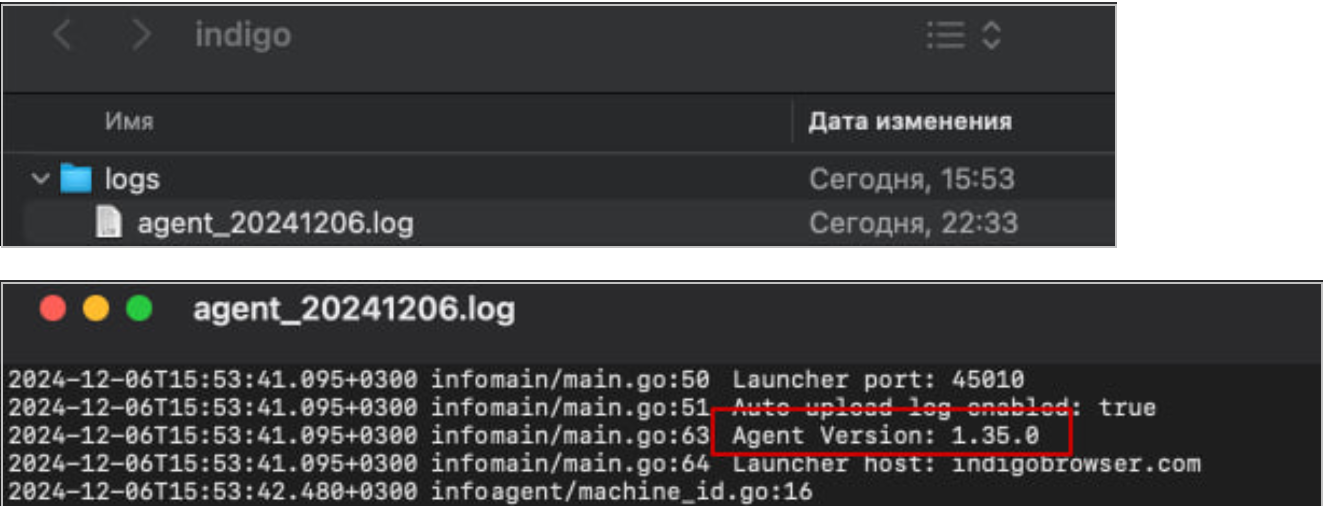
- Go to the folder:
/Users/%username%/indigo/agent - Open the latest agent.log file and check the version
- Go to the folder:
/home/%username%/.indigobrowser/log - Open the latest indigoapp_log.log file and check the version
