How to configure Postman for Indigo X API
Step 1: Set Up Postman
Postman provides a user-friendly interface to interact with APIs. Follow these steps to configure your Postman environment for the Indigo X API.
1.1 Install Postman
Download and install Postman for your operating system from the official website. Alternatively, you can use the web version of Postman.
1.2 Import the Indigo X API Collection
The Indigo X API documentation includes a pre-configured Postman collection to simplify setup.
-
Visit the Indigo X API documentation.
-
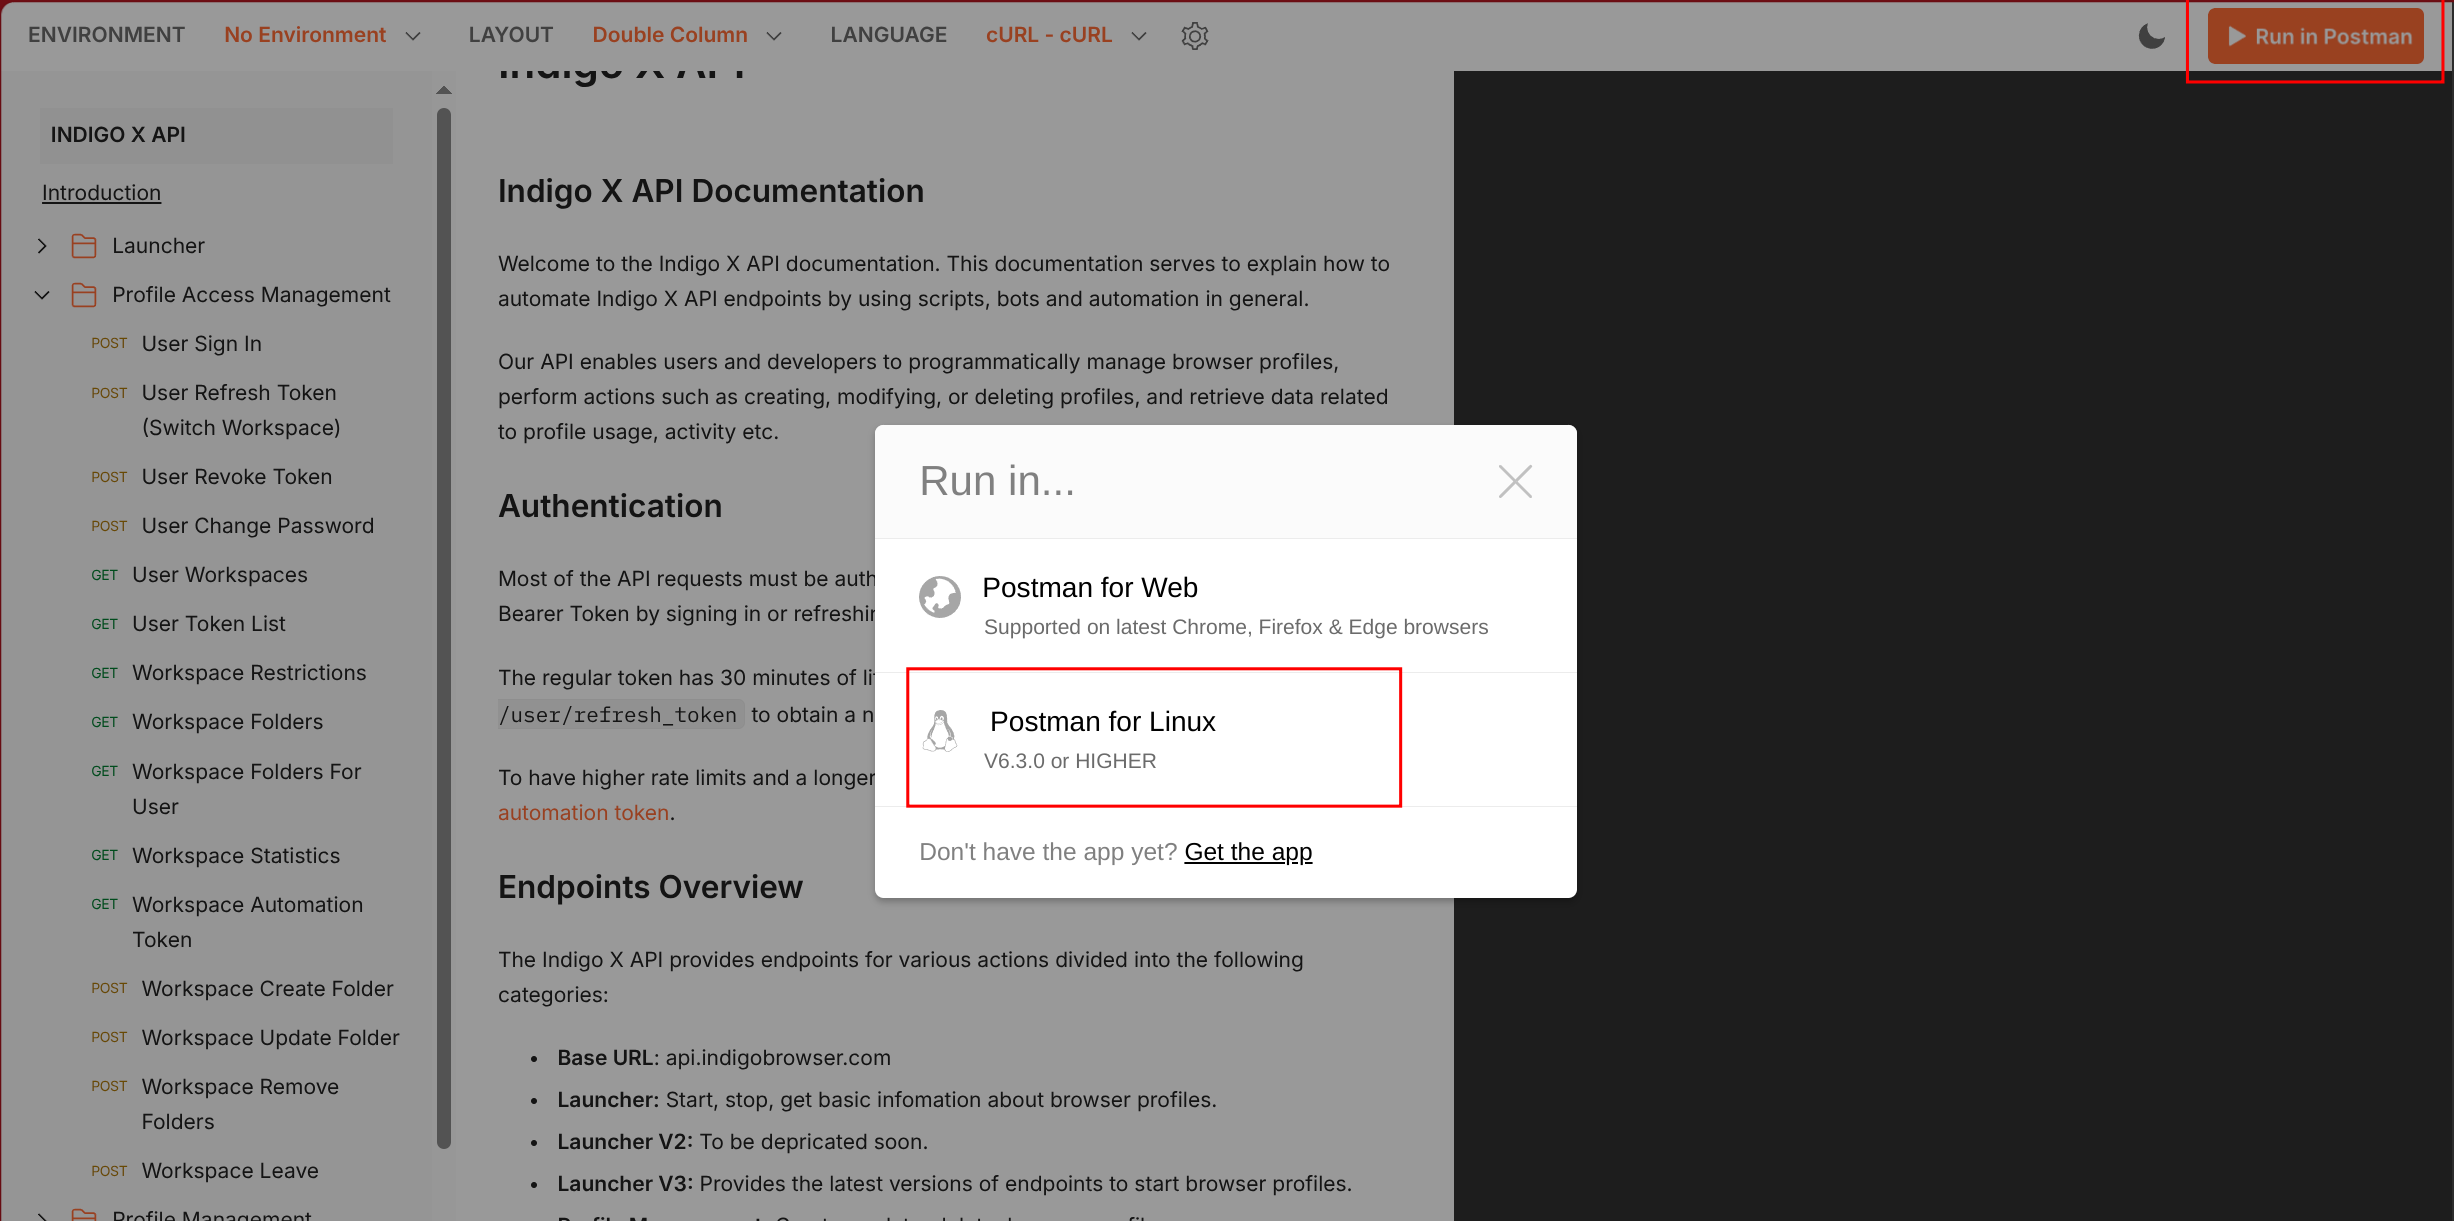
Click Run in Postman in the top-right corner.
-
Select Postman for your OS (e.g., Windows, macOS, Linux) or Postman for Web for the web version.
-
In the Import Collection window, choose your Postman workspace and click Import. This copies the Indigo X API requests into your workspace.
If you prefer, you can manually create a collection in Postman:
- Click New → Collection in Postman.
- Name the collection (e.g., "Indigo X API").
- Add requests manually as needed.
Step 2: Sign In to Your Indigo X Account
To interact with the Indigo X API, you need to authenticate using your account credentials. This involves generating an MD5 hash of your password and obtaining a bearer token.
2.1 Generate an MD5 Hash of Your Password
The Indigo X API requires your password to be hashed using the MD5 algorithm.
- Visit an MD5 Hash Generator.
- Enter your Indigo X account password and generate the hash.
- Copy the resulting MD5 hash for use in Postman.
Ensure you use a trusted MD5 hash generator and avoid sharing your password or hash publicly.
2.2 Sign In via Postman
Use the imported Postman collection to sign in and obtain an authentication token.
-
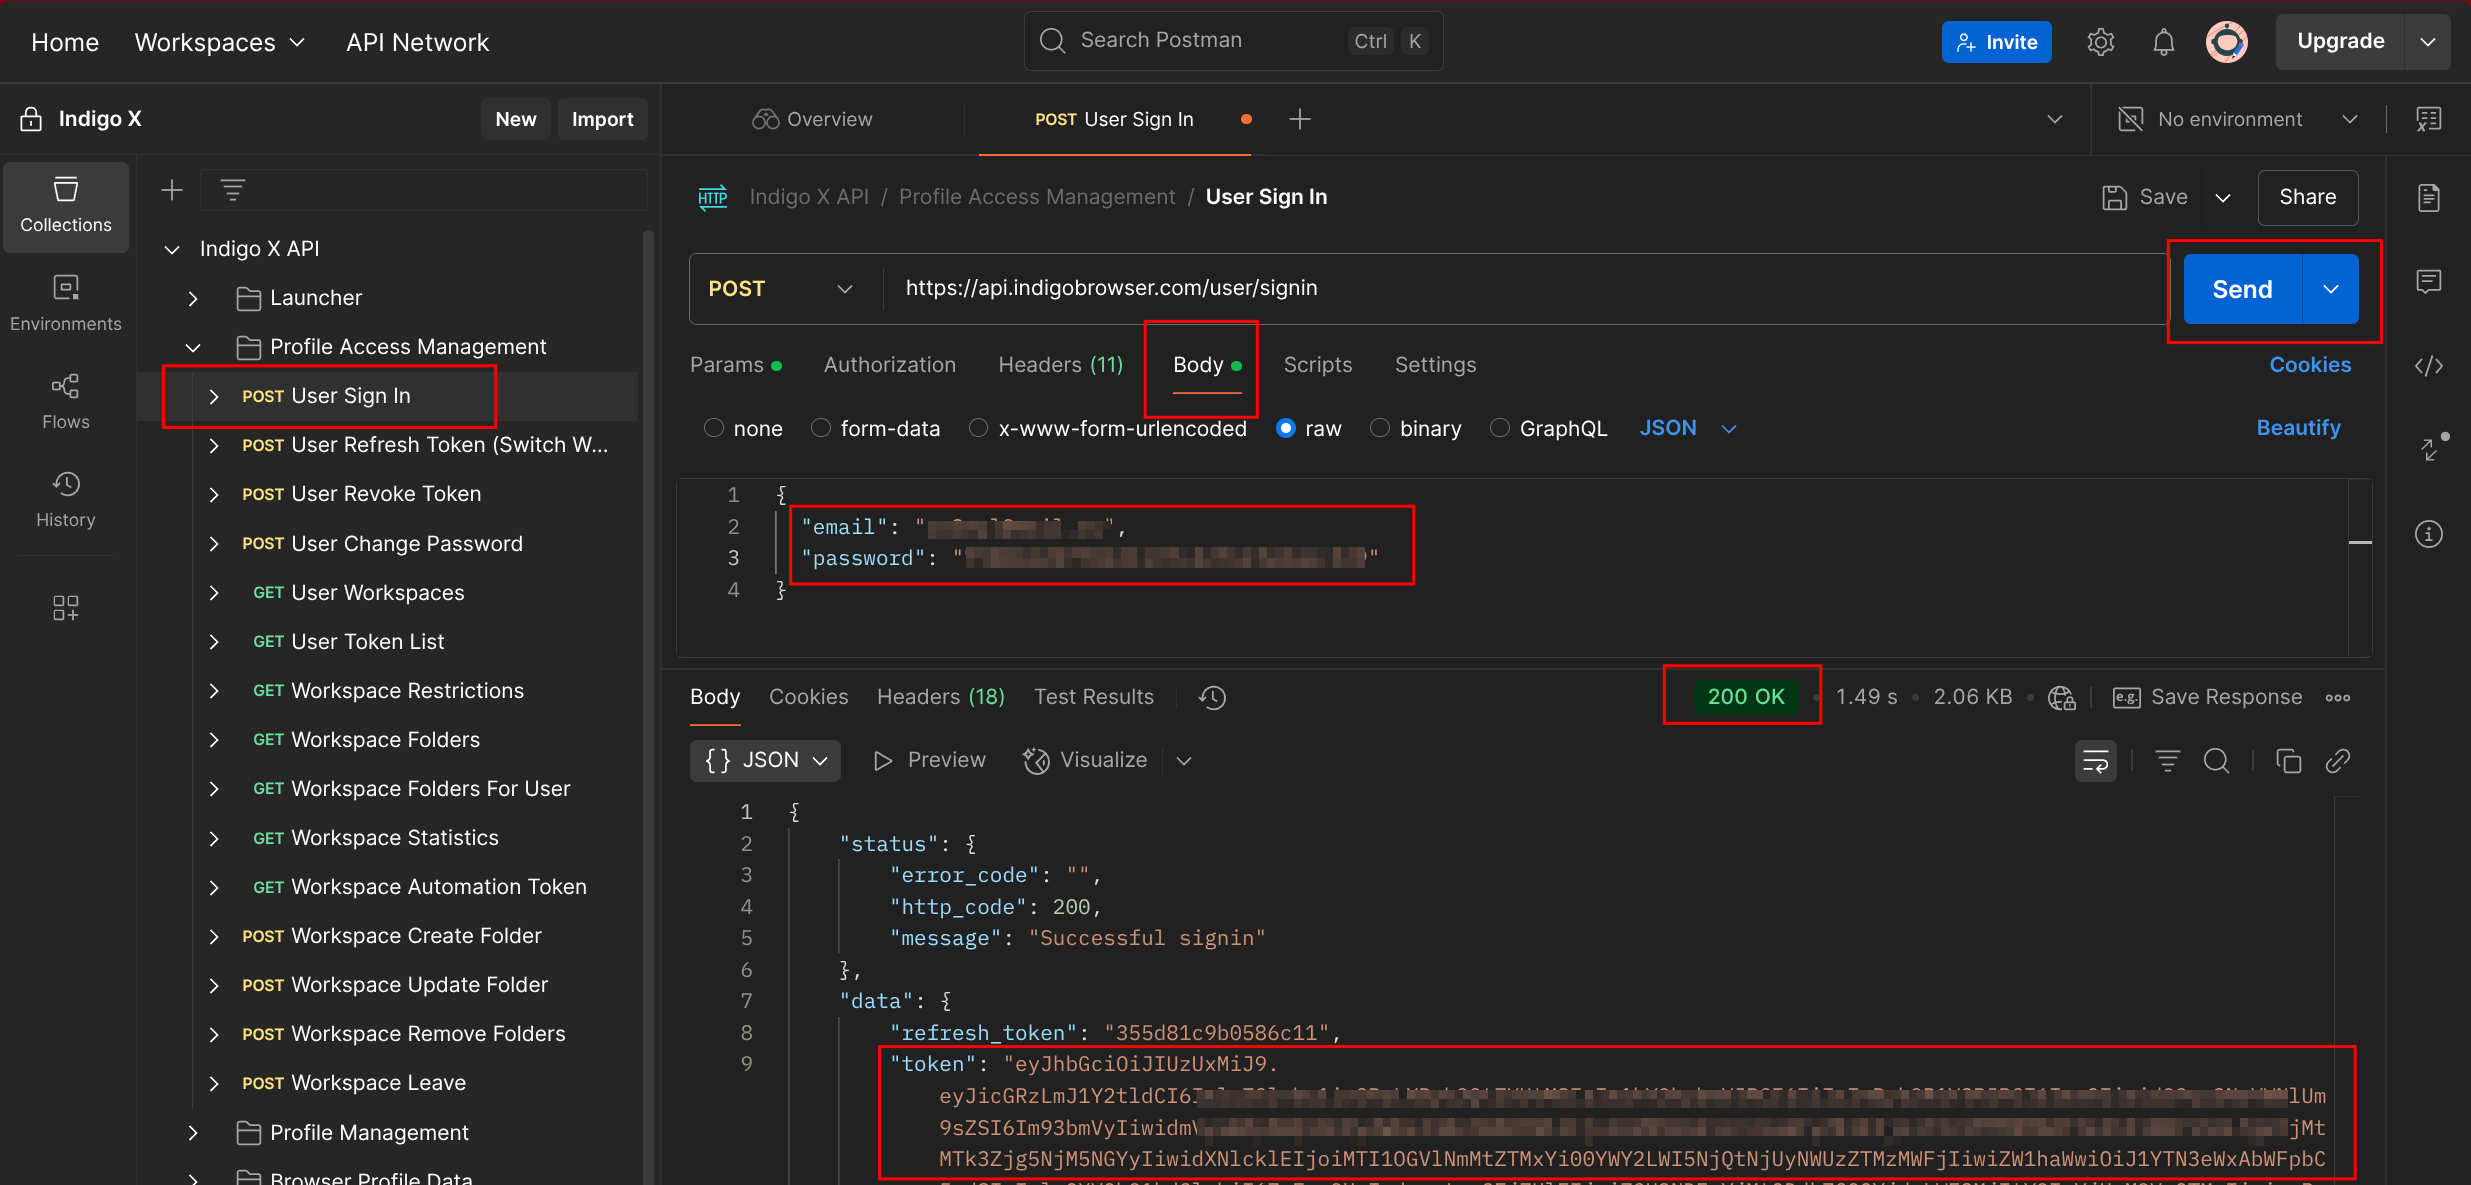
In your Postman workspace, navigate to the Profile Access Management folder.
-
Select the POST User Signin request.
-
In the Body section, enter:
- Your Indigo X account email.
- The MD5 hash of your password (from Step 2.1).
-
Click Send to execute the request.
-
Check the response:
- A 200 OK status indicates a successful sign-in.
- The response body includes a
tokenattribute, which you’ll use for subsequent requests.
The bearer token expires after 30 minutes. To refresh it, use the User Refresh Token endpoint. Alternatively, use an automation token with a custom expiration period.
Step 3: Configure the Bearer Token for Requests
Most Indigo X API requests require a bearer token for authentication. Automate token usage in Postman to streamline your workflow.
3.1 Store the Token in a Collection Variable
Modify the POST User Signin request to automatically store the token.
-
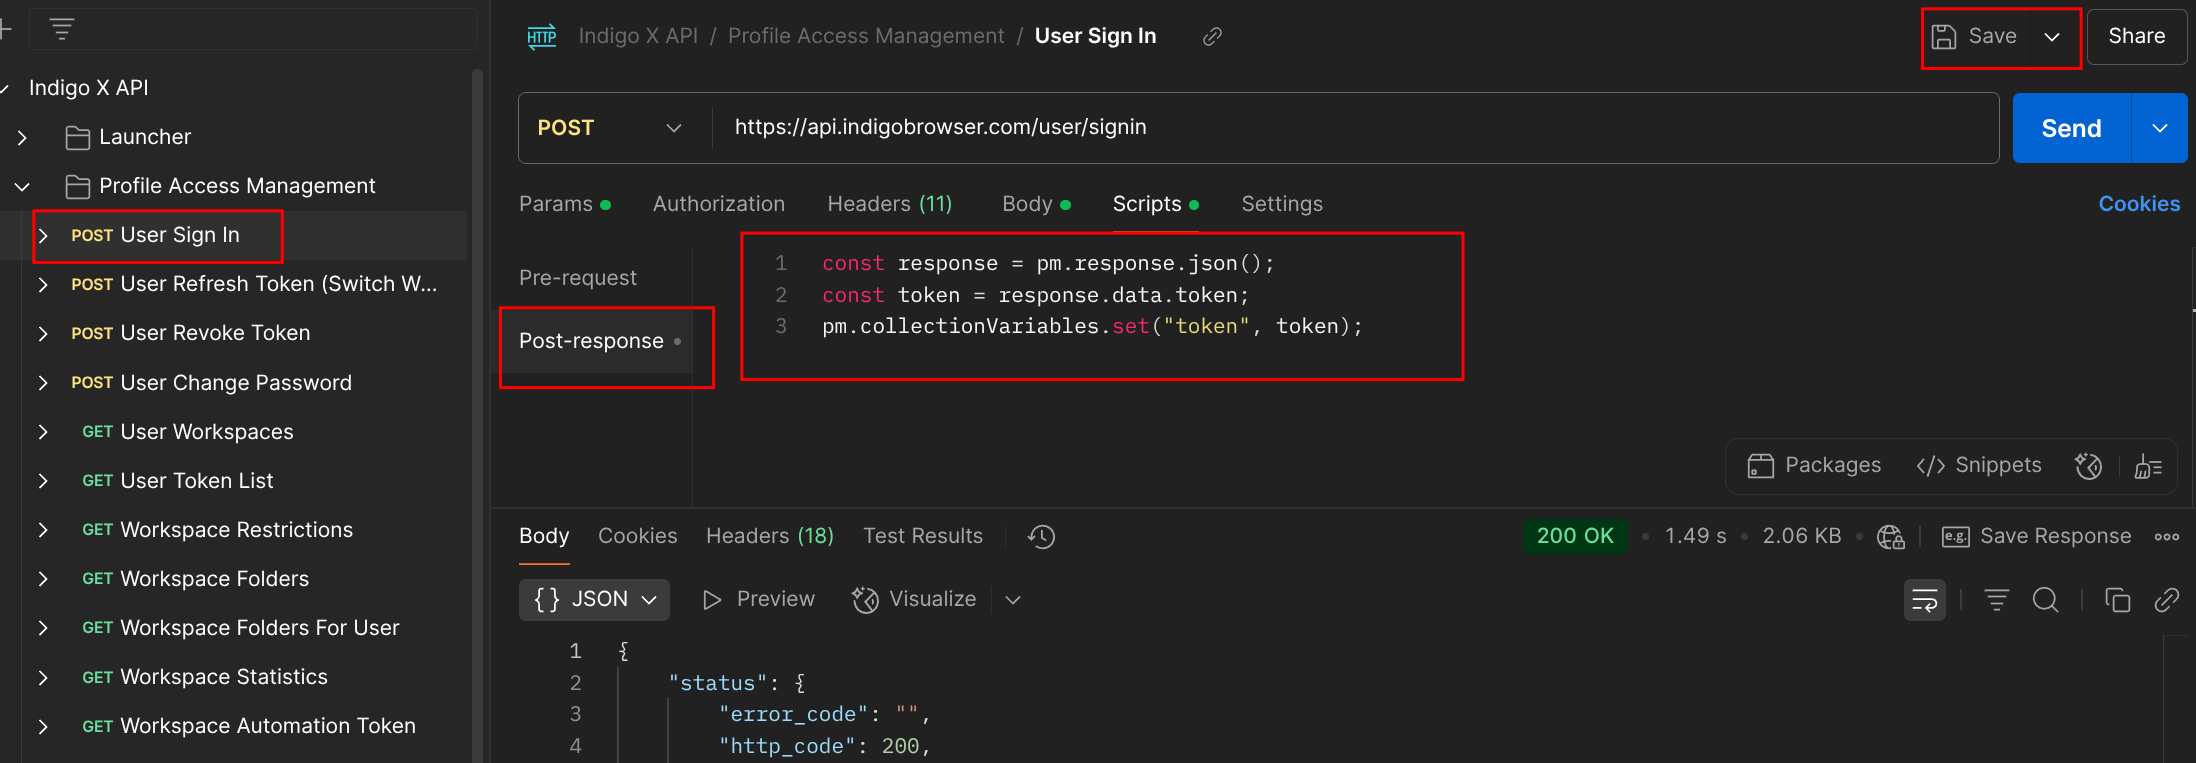
Open the POST User Signin request in Postman.
-
Go to the Scripts tab (previously called "Tests" in some versions).
-
Add the following JavaScript code to extract and store the token:
const response = pm.response.json();
const token = response.data.token;
pm.collectionVariables.set("token", token); -
Save the changes.
-
Re-run the POST User Signin request to ensure the token is stored.
3.2 Set Up Authorization for the Collection
Configure the Indigo X API collection to automatically include the token in all requests.
-
Go to the main Indigo X API collection in Postman.
-
Switch to the Authorization tab.
-
Set the following values:
- Type: Bearer Token
- Token:
{{token}}
-
Save the changes.
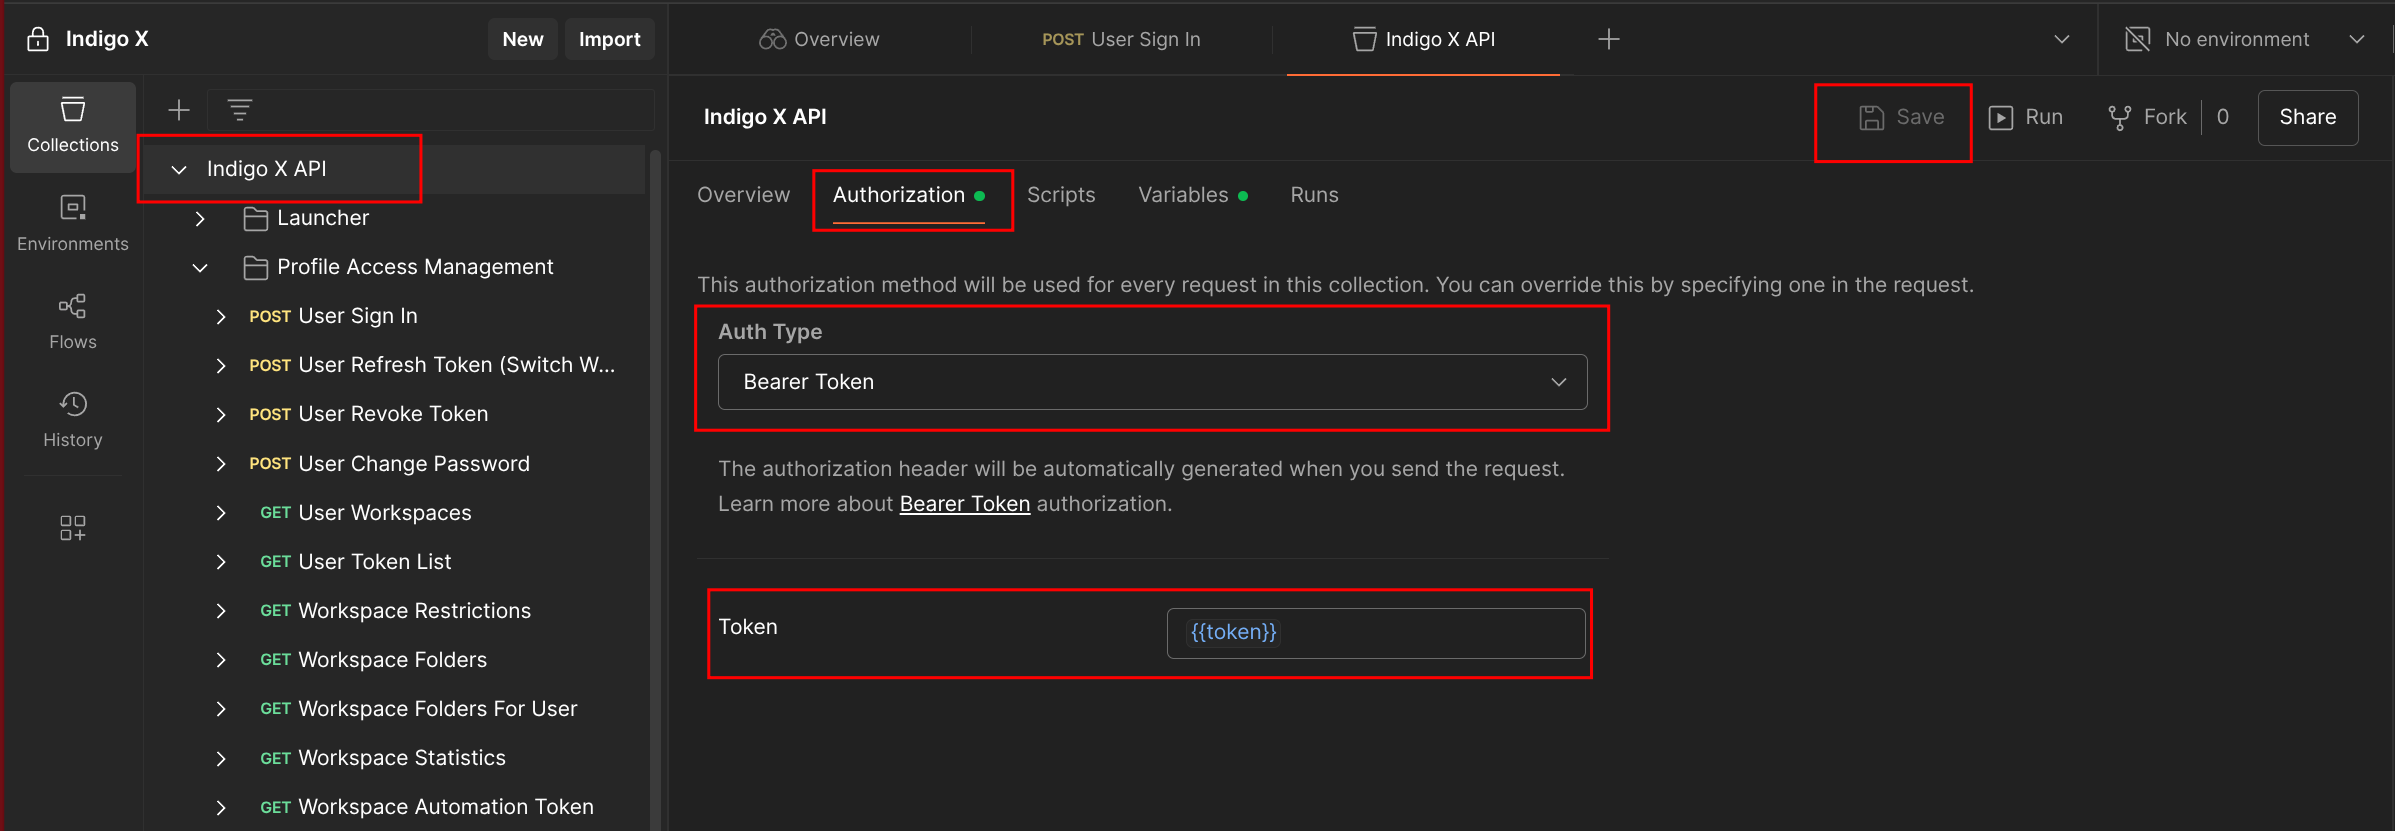
With this setup, the {{token}} variable automatically populates the Authorization header for all requests in the collection, saving you time.
Conclusion
You’ve successfully set up the Indigo X API in Postman! With your workspace configured and bearer token automated, you can now explore the API’s full capabilities, such as creating browser profiles, managing sessions, and automating workflows. If you encounter issues, refer to the troubleshooting section or the official documentation.
Happy API testing!